
Spotify Music Converter is an ultimate solution to help the users to convert any Spotify songs or playlists at faster speed than other Spotify music converts do. It is capable of converting Spotify songs or playlists to MP3, AAC, AIFF, FLAC or WAV format with the original audio quality kept. Now, please follow the step by step tutorial below to learn how to use Spotify Music Converter.
Spotify Music Converter for Mac allows you downloading the program to have a try before purchasing. But the free trial version can only convert 3 music files at a time and convert the first 3 minutes of each audio. To unlock the time limitation, you need to register the program.
![]() Download and Install the latest version of Spotify Music Converter for Mac here
Download and Install the latest version of Spotify Music Converter for Mac here
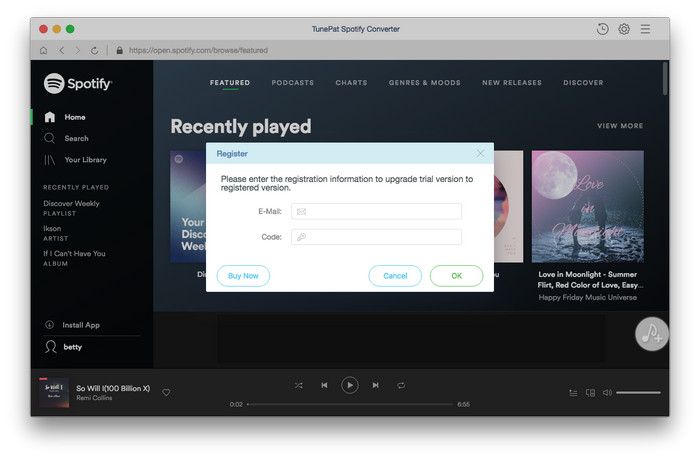
Step 1Click on the "Menu" bar and click Spotify Music Converter. Choose "Register" in the drop-down list, then you will get the register window as below.

Step 2 Then copy and paste the registration Email and Code into the registration popup Window.
Note: The license information is case sensitive. And, please do not add blank at the beginning or the end of the word.
Step 1 Launch Spotify Music Converter on Mac, then log in your Spotify account. Or click SIGN UP to setup a Spotify account if you haven't.

Step 2 Then click on the ![]() button on the top right corner to choose the Output Format (MP3/AAC/AIFF/FLAC/WAV), the Output Quality (256kbps, 192kbps, 128kbps) and Output Path.
button on the top right corner to choose the Output Format (MP3/AAC/AIFF/FLAC/WAV), the Output Quality (256kbps, 192kbps, 128kbps) and Output Path.
Note: If you choose "Auto" as the output format, Spotify Music Converter will convert music at faster speed.
For better organizing your music library, you can save the output audio files into organized folder like Artist, Album, Artist/Album, or Album/Artist.

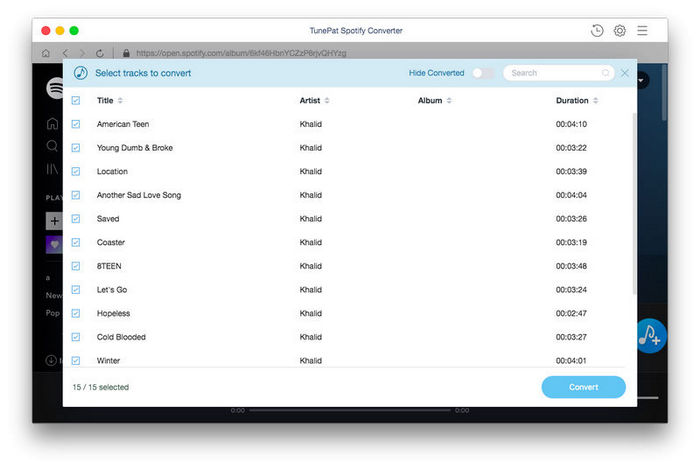
Step 3 Open a playlist, artist or album, then click on the Add ![]() button and select the songs that you'd like to convert.
button and select the songs that you'd like to convert.

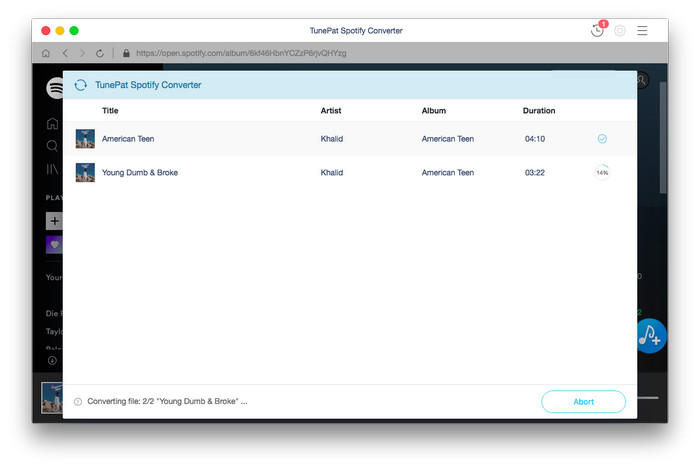
Step 4 Click on "Convert" button to start converting the Spotify songs to the output format you chosen.

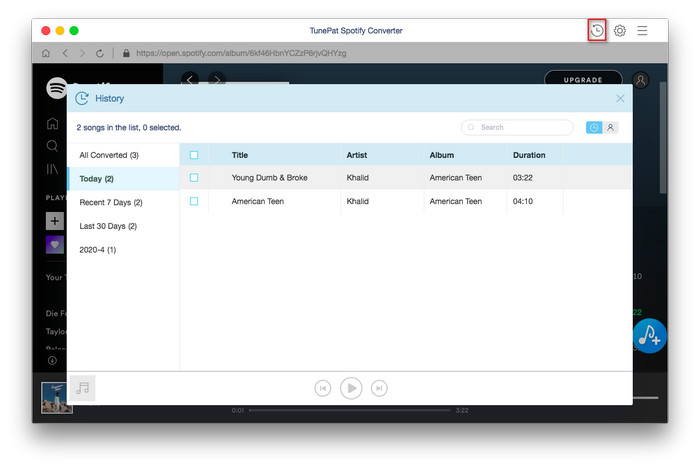
Step 5 After the conversion completed, you can click on ![]() to find the well converted music.
to find the well converted music.
